
How to Set Up a Gmail Account on iPhone
Setting up a Gmail account on your iPhone is simple and allows you to manage your emails efficiently while on the move. This guide walks you step by step through adding your Gmail account to the Mail app, so you can easily send and receive emails from your device.
- Setup a Gmail Account on iPhone
Before starting, make sure your email account is already logged in and set up in your Control Panel.
- Add a Mail Account
- Open Settings on your iPhone.
- Tap Mail, then select Add Account.
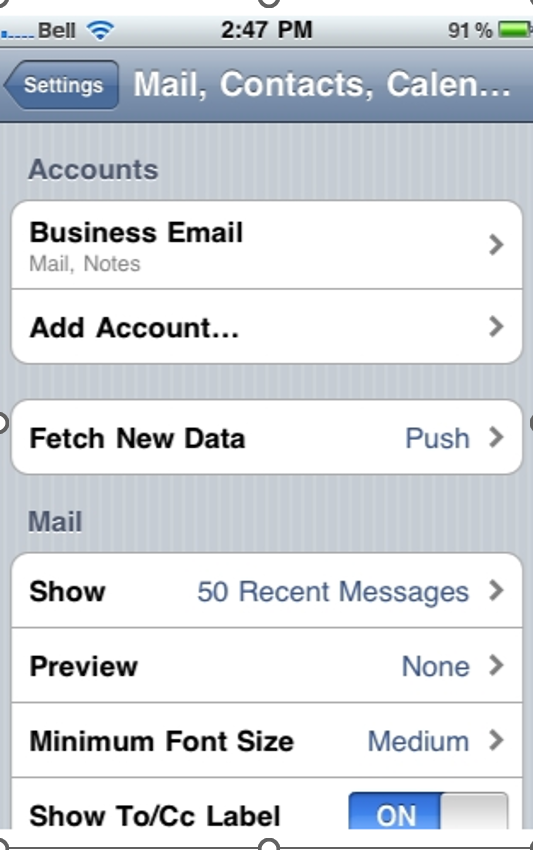
- Setup Gmail Account
- Choose Gmail from the list of email providers.
- Enter the required information:
- Name: The sender name you want to display.
- Email Address: Your Gmail address.
- Password: Your Gmail password.
- Description: A label for your account (you can customize this).
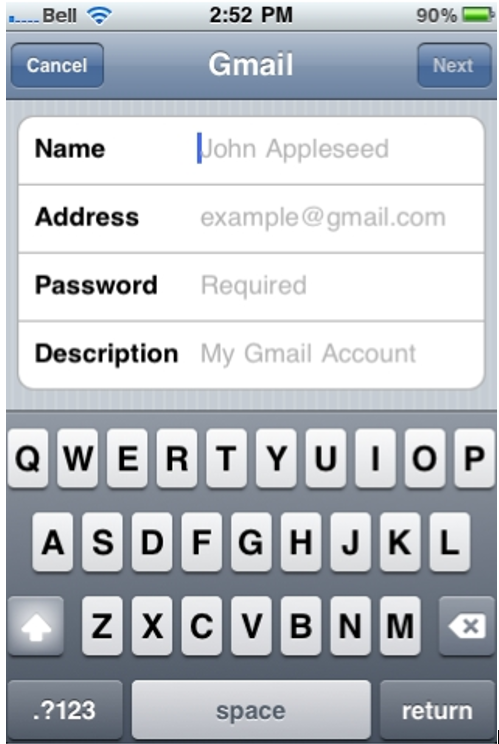
3. Tap Next and then Save to complete the setup. Your Gmail account will now appear under Accounts in Settings.
- Checking Your Emails
- Press Home to return to the main screen.
- Open the Mail app (the icon location may vary).
- If you have multiple accounts, select the Gmail account you just added.
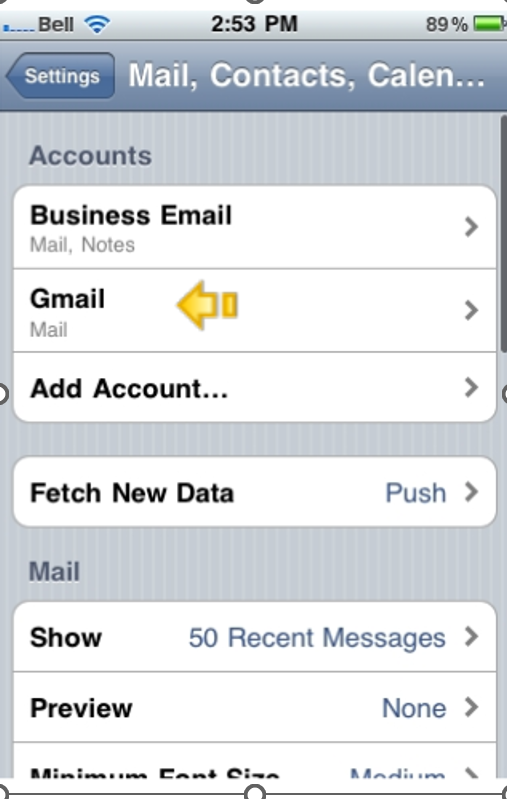
4. Your inbox will appear, and you can tap any email header to view the full message.
- Additional Information
Sync Settings and Options
- To ensure emails appear promptly, check your sync settings: Settings > Mail > Accounts > [Your Gmail Account].
- You can choose what to sync, including Mail, Contacts, Calendars, and Notes. Toggle the options according to your preference.
Push Notifications and Real-Time Email Alerts
- To receive instant notifications, make sure Push is enabled: Settings > Mail > Accounts > Fetch New Data.
- Adjust alert settings via Settings > Notifications > Mail to ensure you receive real-time notifications for new messages.
Troubleshooting
- Double-check your email address and password.
- Verify your internet connection.
- Restart your iPhone if emails don’t appear.
- If issues persist, consider removing the account and setting it up again.

