
Setting up an email signature on your iPhone is quick and easy, and it allows you to personalise your messages with essential details like your name, job title, and contact information. This guide walks you through the process step by step, ensuring your emails always look professional.
How to Set Up an Email Signature on iPhone
- Open Settings – Tap the Settings icon on your home screen, or swipe down from the top of your screen to access the search bar and type “Settings.”
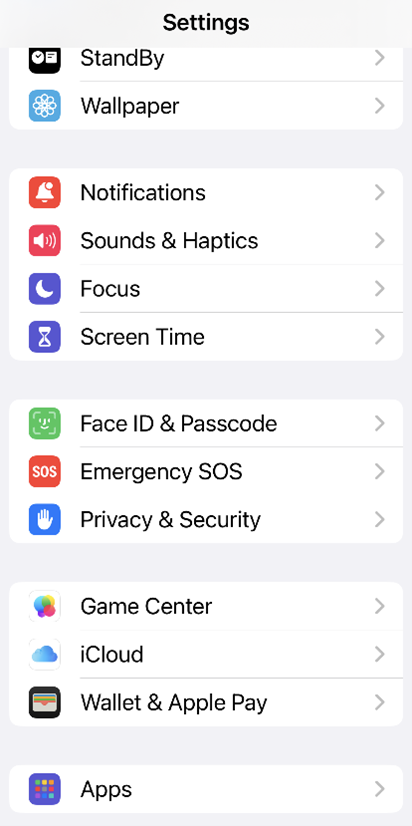
2. Select Apps – Scroll down and choose Apps from the list of options.
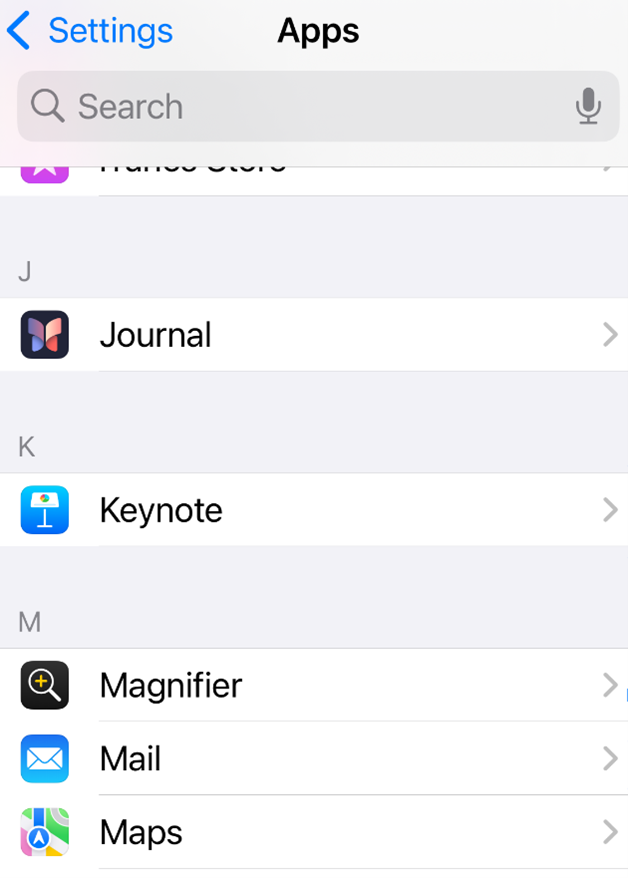
3. Scroll down until you see Mail and tap it to open it up.
Creating Your Signature
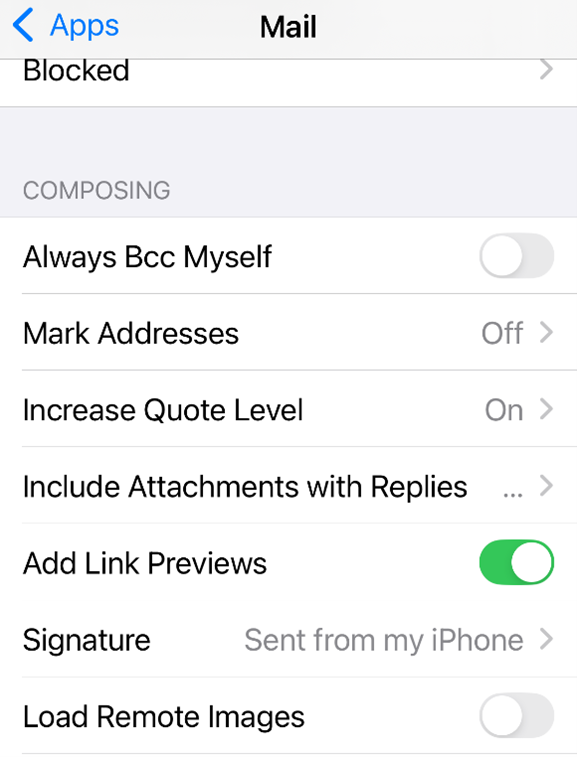
4. Edit Signature – In the Signature field, delete any default text (like “Sent from my iPhone”) and type the information you want to display at the end of your emails. Include details such as your name, title, company, and contact info.
- If you have multiple email accounts, you can choose All Accounts to use the same signature for every account, or Per Account to create unique signatures for each email address.
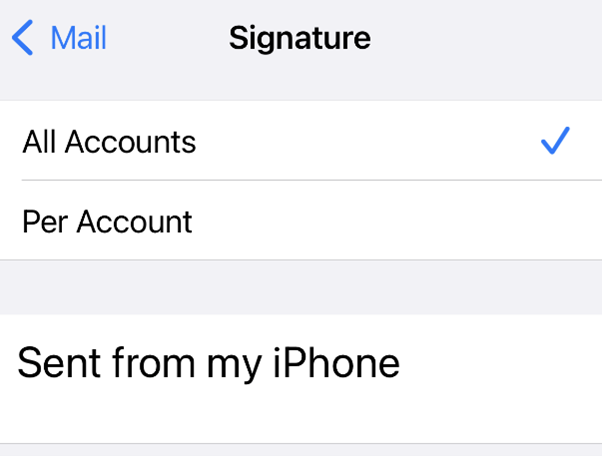
5. Save Changes – After entering your signature, tap the back arrow in the top left corner or select Mail to return to the previous menu.
6. Check Your Signature – Open the Mail app and tap Compose (the pencil-and-paper icon) to create a new email. Your signature should appear automatically at the bottom.
Congratulations! Your email signature is now set up on your iPhone.
Additional Information: Email Signature Best Practices
Customising Your Signature
If you manage multiple email accounts, create separate signatures for each account to maintain clarity and professionalism.
Formatting Options
The iPhone Mail app supports basic text formatting. You can use line breaks, but avoid overly complex designs, as they may not display correctly across all email clients.
Testing Across Devices
Send test emails to other devices, such as a computer or another mobile device, to ensure your signature appears consistently.
Including Links
URLs can be included in your signature, but they are not clickable in the Mail app. Use plain text links that recipients can copy and paste if needed.
Keeping It Professional
Maintain a clean, professional appearance. Avoid excessive colors or multiple fonts. Simplicity enhances readability and conveys professionalism.
Updating Your Signature
Regularly update your signature when your contact details, role, or company change to ensure recipients always have accurate information.
Using an Email Signature Generator
For a more polished look, consider using an online email signature generator. These tools allow you to include logos, social media icons, and more. Once generated, simply copy and paste the signature into your iPhone Mail settings.
Legal Disclaimers
If required, include a legal disclaimer in your signature, particularly if you work in a regulated industry. This helps protect sensitive information and clarifies the nature of your communications.

