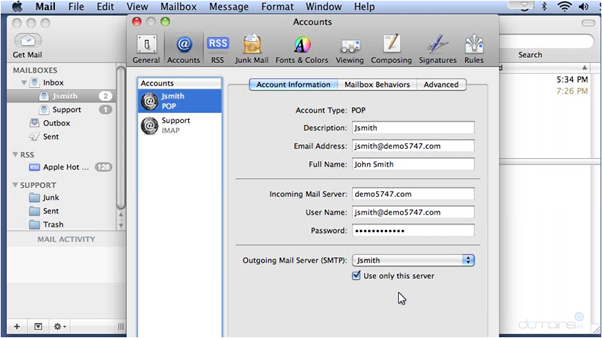
An outgoing mail server is what your email program uses to send messages. Without at least one server set up, you won’t be able to send emails.
Setting Up and Managing Outgoing Servers
- Open Mail, then go to Preferences.
- If this screen doesn’t appear, make sure the Accounts tab is selected.
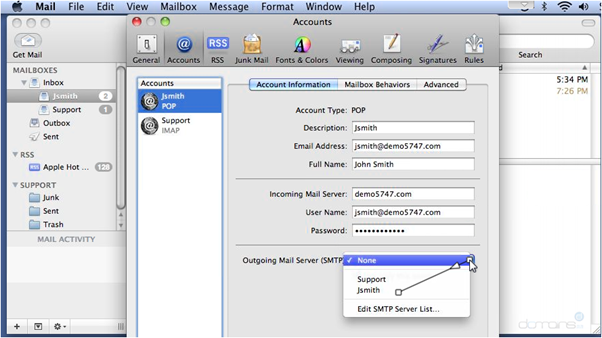
- Each account can use its own Outgoing Mail Server (SMTP).
- Click Outgoing Mail Server to view or edit your SMTP settings.
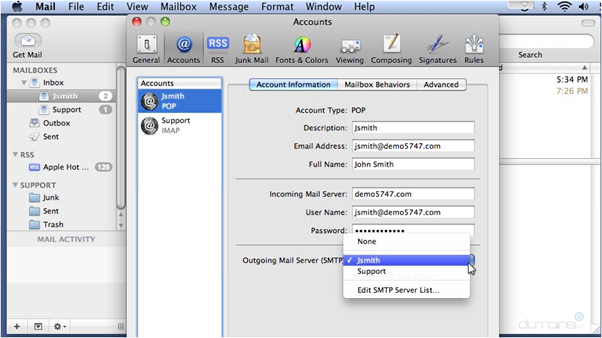
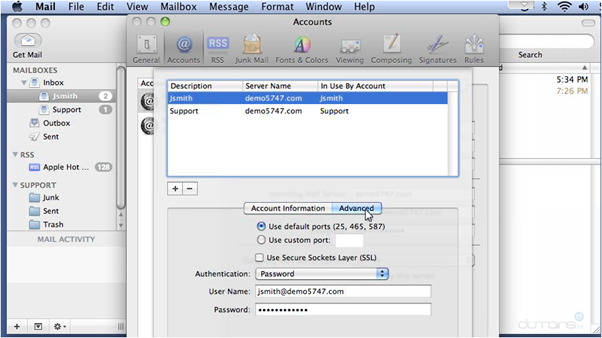
The top section shows all outgoing servers you’ve added, and the bottom displays details for the server you select.
Advanced Settings
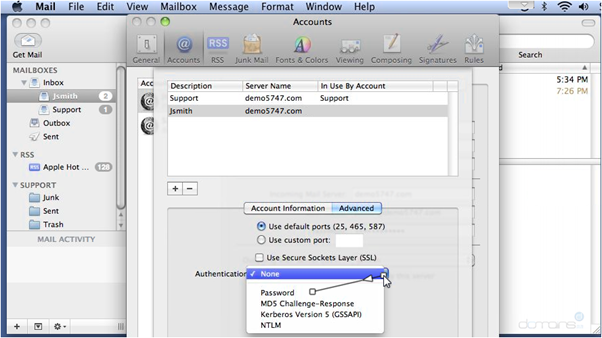
- Select Advanced to configure extra options, such as:
- Custom ports
- SSL security
- Authentication method
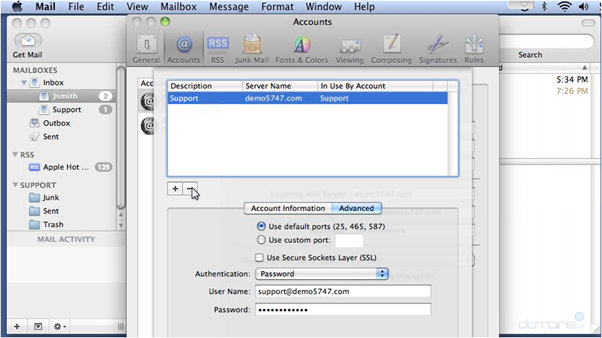
Deleting a Server
- To remove a server, select it and click the minus (-) icon.
Note: Deleting a server is permanent and cannot be undone.
Adding a New Server
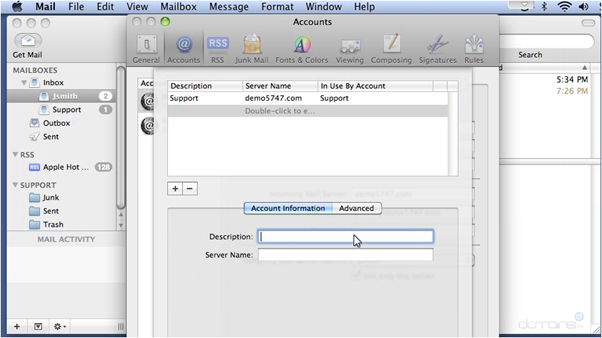
- To add a new server, click the plus (+) icon.
- Enter a short Description (for easy identification).
- Type in the Server Name.
- If needed, choose an Authentication method.
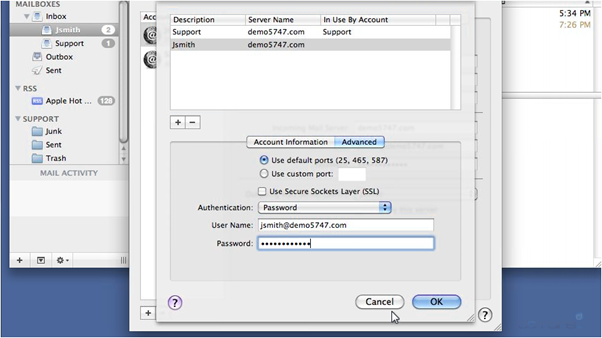
- Enter the Username and Password.
- Click OK to save.
Using the New Server
- From the list of outgoing servers, select the one you just added.
That’s it! You now know how to create, edit, and manage outgoing mail servers in Apple Mail.