
How to Install a WordPress Plugin: A Step-by-Step Guide
Adding a WordPress plugin to your website is an easy yet powerful way to enhance its functionality. Plugins can bring a variety of features, including improved security, faster performance, social media integration, and SEO optimization.
Whether you are an experienced developer or just starting out, installing plugins can significantly boost your website’s capabilities. To help you get started, we’ve created this detailed guide on how to install a WordPress plugin.
How to Install a WordPress Plugin
Step 1: Access the WordPress Dashboard
- Log in to your WordPress Admin Area at yourwebsite.com/wp-admin using your username and password.
- In the left-hand menu, hover over Plugins and click Add New.
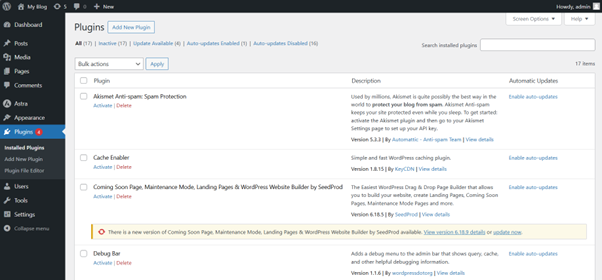
Step 2: Search for a Plugin
- On the Add Plugins page, use the search bar to find the plugin you want by name or keyword.
- You can also browse through Featured, Popular, Recommended, or Favorite Plugins to discover useful options.
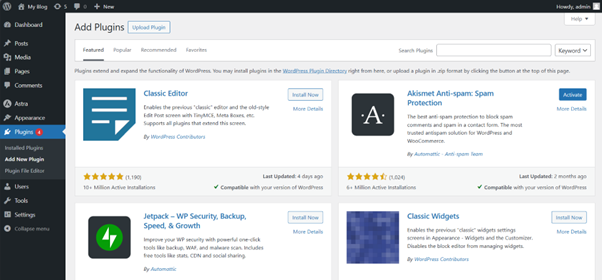
Step 3: Install the Plugin
- Once you’ve found your desired plugin, click Install Now.
- Wait a few moments while WordPress downloads and installs the plugin.
Step 4: Activate the Plugin
- After installation, click Activate to enable the plugin on your website.
- Configure the plugin settings if necessary, usually found under Settings or the plugin’s menu in the dashboard.
Step 5: Upload a Plugin (Optional)
- If your plugin comes as a .zip file, click Upload Plugin on the Add Plugins page.
- Select the file from your computer and click Install Now.
- After uploading, click Activate to enable the plugin.
Additional Resources
Plugin Maintenance & Best Practices
- Back Up Your Website: Always back up your site before installing new plugins to safeguard against issues.
- Check Compatibility: Ensure the plugin works with your WordPress version and other installed plugins.
- Read Reviews: User ratings and reviews can help evaluate plugin quality and support.
- Update Regularly: Keep plugins updated to benefit from the latest features and security patches.
- Remove Unused Plugins: Deactivate and delete plugins you don’t use to reduce security risks.
- Test After Installation: Verify your website functions correctly and there are no conflicts.
- Monitor Performance: Some plugins may impact site speed, so keep an eye on performance.
Different Login Methods
Login to tandohost.co.za Account
- Go to the tandohost.co.za login page. Login - TandoHost
- Enter your email and password, then click Sign In.
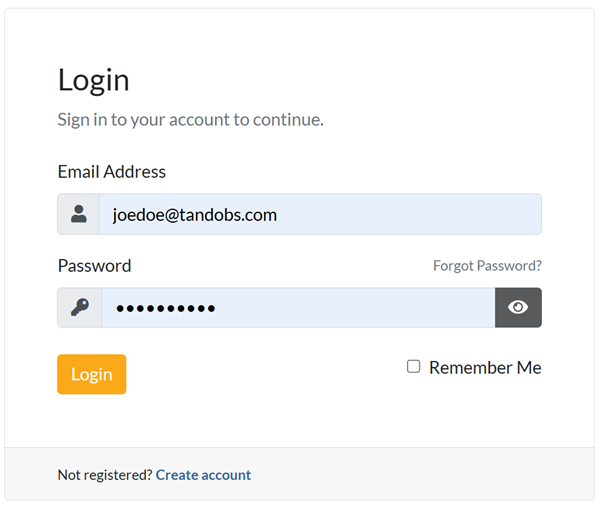
Accessing WordPress via tandohost.co.za
Log in to tandohost.co.za Account
- Go to the tandohost.co.za Login Page. Login - TandoHost
- Enter your email and password, then click Sign In.
3. Under Product/Services, click Login next to WordPress.

4. On the cPanel dashboard, select WP Toolkit or WordPress Management.
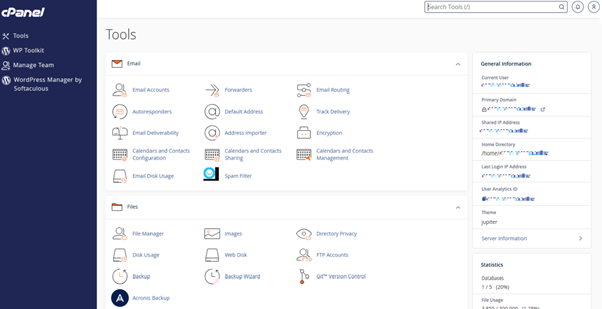
Access WordPress Online via cPanel
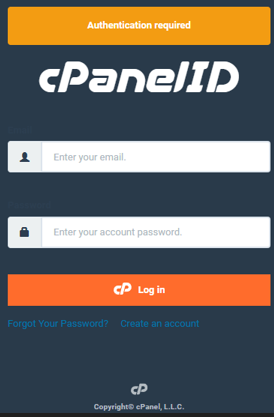
- Visit your cPanel login URL.
- Enter your email and account password, then click Log In.
3. Once logged in, select WP Toolkit or WordPress Management from the right-hand menu.

