
Keep Your WordPress Site Fresh: How to Remove a Post
Over time, certain content on your WordPress site can become outdated, irrelevant, or no longer serve its original purpose. In such cases, you’ll need to delete those posts to maintain a clean and organized website. Keeping your site up-to-date helps with user experience, search engine optimization (SEO), and overall site performance. This process, known as content pruning, ensures your website remains relevant and well-structured.
In this guide, you’ll learn:
- How to delete a post in WordPress
- How to manage content in the Trash folder
- How to bulk delete posts efficiently
This article complements our YouTube tutorial “How to Remove Unwanted Posts in WordPress” and assumes you’re already logged into your WordPress dashboard.
Steps to Remove a WordPress Post
Cleaning up your site is simple. You can delete test posts, drafts, or old content in a few clicks. WordPress also lets you restore deleted posts or remove them permanently.
Before you start, make sure you’re logged into your admin area:
yourdomain.com/wp-admin
- On the left sidebar, hover over Posts to open the submenu.
- Click All Posts to see all published, draft, and trashed posts.
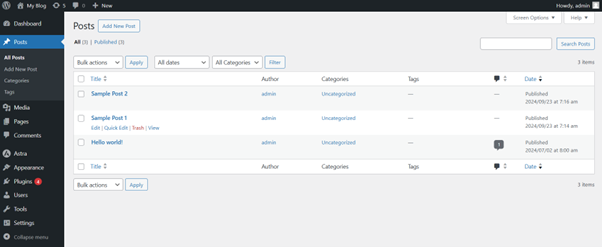
3. Find the post you want to delete. Use the search bar or filters if needed.
4. Hover over the post title to see options: Edit, Quick Edit, Trash, View.
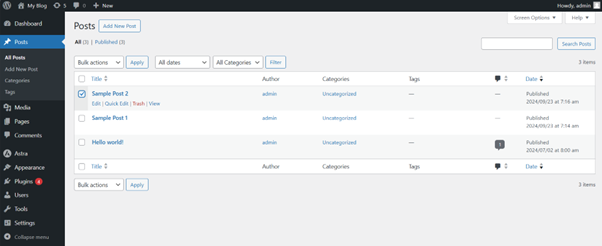
5. Click Trash to move the post to the Trash folder.
Note: Moving a post to Trash doesn’t permanently delete it. You can restore or permanently delete it later.
Managing Deleted WordPress Posts
To manage posts in Trash:
1. Go to All Posts > Trash.
2. Hover over the post to see two options:
- Restore – Return the post to its previous status.
- Delete Permanently – Remove the post from your site completely.
Bulk Deleting Posts
Need to delete multiple posts at once?
1. In All Posts, select the checkboxes next to the posts you want to delete.
2. From the Bulk Actions dropdown, select Move to Trash, then click Apply.
Additional Tips
- Draft Posts: Drafts can also be deleted using the same steps.
- Edit Before Deleting: If unsure, click Edit or Quick Edit first.
- Scheduled Posts: Scheduled posts can be deleted before they go live.
Accessing WordPress via tandohost.co.za
Log in to tandohost.co.za Account
- Go to the tandohost.co.za Login Page. Login - TandoHost
- Enter your email and password, then click Sign In.
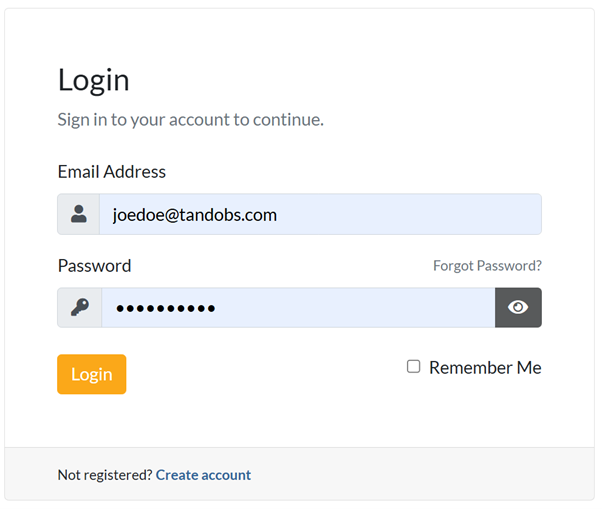
3.Under Product/Services, click Login next to WordPress.

4. On the cPanel dashboard, select WP Toolkit or WordPress Management.
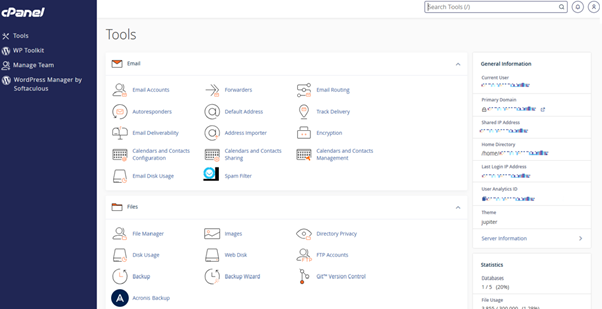
Access WordPress Online via cPanel
- Visit your cPanel login URL.
- Enter your email and account password, then click Log In.
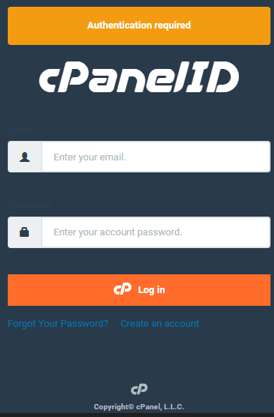
3. Once logged in, select WP Toolkit or WordPress Management from the right-hand menu.

