How to Write and Publish Your First WordPress Blog Post
Publishing your first blog post on WordPress is an exciting step toward sharing your ideas with the world. WordPress makes this process simple with an intuitive editor that allows you to customize your post’s look and layout. From structuring your content to selecting the right publishing options, this guide will walk you through everything you need to know to create and publish your first article.
Note: This guide assumes you are already logged into your WordPress dashboard. It also complements our YouTube tutorial: “Your First Blog Post Awaits! Write & Publish on WordPress.”
Writing a WordPress Blog Post
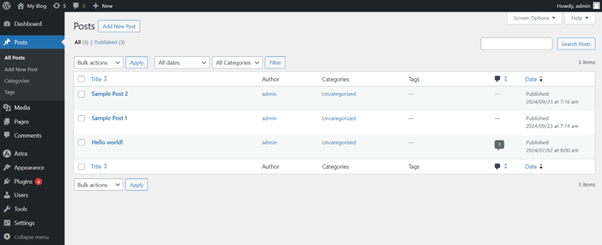
To create your first post, start from the WordPress Dashboard:
- In the left-hand menu, hover over “Posts.” You’ll see options such as:
- All Posts
- Add New
- Categories
- Tags
2. Click “Add New” to open a blank post editor.
3. A new page titled “Add New Post” will appear. You’ll find:
- Add Title: For your blog’s main heading
- Content Area: Where you’ll write or paste your article
4. Enter a title in the Add Title field at the top of the page
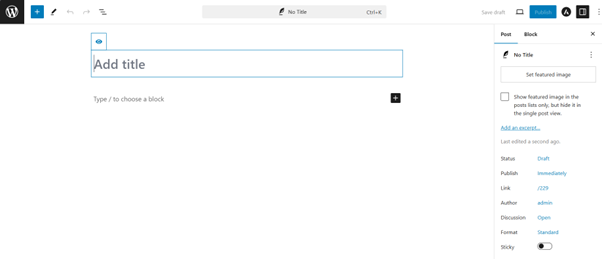
5. In the content block, start typing your blog post or paste your prepared content.
The WordPress Block Editor allows you to:
- Format text (bold, italics, colors)
- Add hyperlinks
- Organize content with lists, tables, and custom HTML
- Insert media such as images, videos, and galleries
- To add more content elements, click the (+) Add Block icon. From here, you can insert:
- Images (upload or select from the Media Library)
- Videos
- Quotes
- Galleries
- Custom code
Once you’ve added your content, proceed to the right sidebar for additional post settings.
Configuring WordPress Blog Settings
If the Settings panel isn’t visible, click Settings in the top-right corner. Here, you can manage:
- Visibility Options:
- Public: Visible to everyone
- Private: Visible only to admins and editors
- Password-Protected: Viewable only by those with the password
- By default, posts publish immediately
- To schedule a future date/time, click Immediately, then choose your desired time and date
- Generated automatically based on your title
- Can be edited for SEO (keep under 75 characters)
- Choose an existing category or create a new one for better organization
- Add keywords related to your post to improve searchability
Publishing Your WordPress Blog Post
Once your content and settings are ready:
- Preview Your Post
- Click Preview to see how your post will look on your site
- Click Publish (top-right)
- Confirm visibility and schedule settings
- Click Publish again to go live
- Click View Post or navigate to your blog page to confirm everything looks correct
Additional Tips
- Editing After Publishing: Go to Posts > All Posts, hover over the post title, and click Edit
- Featured Images: Add an eye-catching image from the sidebar to make your post stand out
- Excerpts: Create a custom excerpt to display on your blog homepage
Accessing WordPress via tandohost.co.za
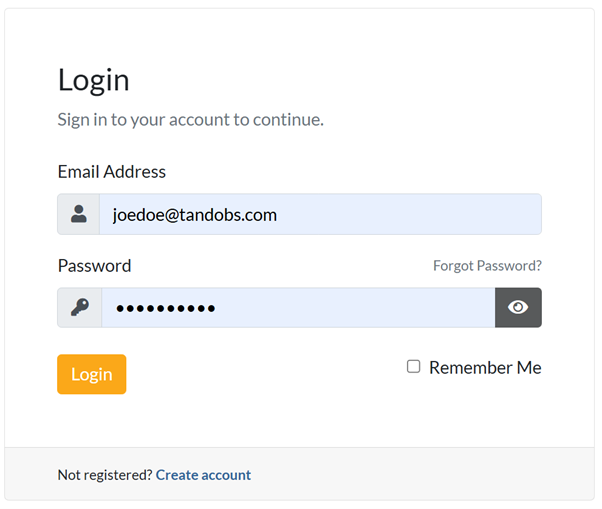
Log in to tandohost.co.za Account
- Go to the tandohost.co.za Login Page. Login - TandoHost
- Enter your email and password, then click Sign In.
Access WordPress via cPanel
2. Under Product/Services, click Login next to WordPress.

3. On the cPanel dashboard, select WP Toolkit or WordPress Management.
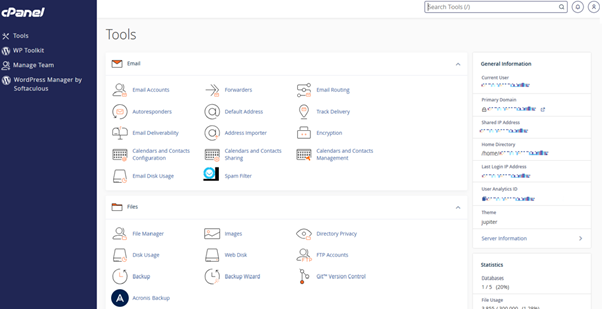
Access WordPress Online via cPanel
- Visit your cPanel login URL.
- Enter your email and account password, then click Log In.
3. Once logged in, select WP Toolkit or WordPress Management from the right-hand menu.
